1 Calibrating SAFR SCAN 3D Structured Light Sensor
1.1 About SAFR SCAN Calibration
If the SAFR SCAN device experiences a physical shock, the 3D sensor may go out of calibration which will prevent SAFR from verifying liveness and granting access.
1.2 Symptom
SAFR recognizes the person (name appears on event in Live View) but does not verify liveness (Green heartbeat icon does not appear on the event in Live View).
2 Check Calibration
You can verify calibration is the root cause by using Face 3D mode in the Live View by following the procedure below. For more examples, please review Checking Calibration at https://docs.real.com/access/guides/articles.
2.1 Check Calibration Procedure
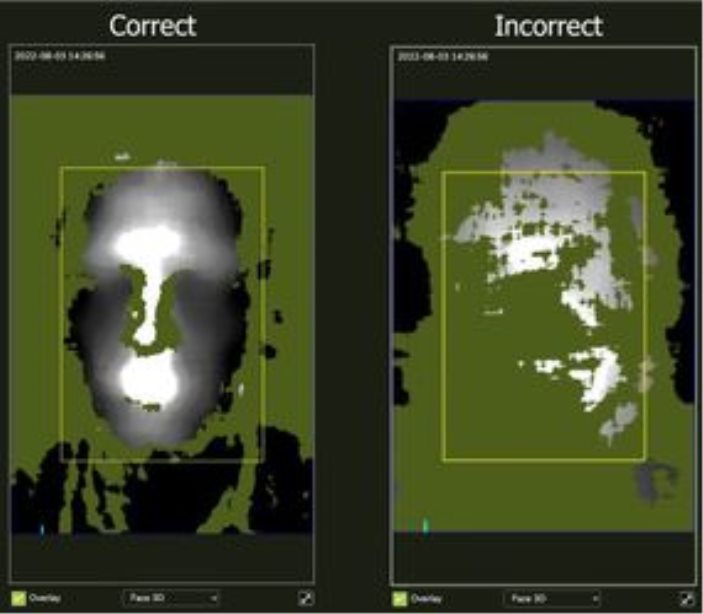
- Open SAFR SCAN Web Console, Go to Live View, Change view to "Face 3D" with dropdown below preview.
- Move your face to 1 foot in front of display and look directly at display.
- You should see a 3D view of a face that looks something like the image on the left below labeled "Correct". If the image looks like the one on the right labeled "Incorrect", an adjustment is needed.
This guide describes how to Calibrate SAFR SCAN. For information on if calibration is required, please review Checking Calibration at https://docs.real.com/access/guides/articles.
3 Calibration
3.1 Prepare for Calibration
- Find a location where there is a flat uniform surface that is 4 meters high and 2.5 meters wide.
- The reader needs to be placed at a height of 5 to 6 feet and the face of the reader MUST BE parallel to the surface (both vertically and horizontally).
-
There should be ambient dim light - not too bright and not pitch black.
- Use Calibration page (see below) and make sure there are no strong light patterns on the wall.
-
View the Web Console Live View in Visible Spectrum and check the preview - should be uniform and even and not too bright.
- Turn off the IR and White Light if they are projecting a pattern onto the wall.
- Mount the reader securely in this location so that it is free of motion.
- Check it is parallel by carefully measuring the distance of the reader from each corner - given the small distance from center, very precise measurement should be made (± 1/8" or 3mm).
-
Double check there are no obstructions causing an uneven surface and that color of surface is consistent.
- A small white spot in center below the pattern is expected.
3.2 Open Calibration Page
- Log into SAFR SCAN Web Console
- Add “&debug=1” to the end of the URL and press enter.
- Click on the System tab.
- Click on “Calibration” page on the left.
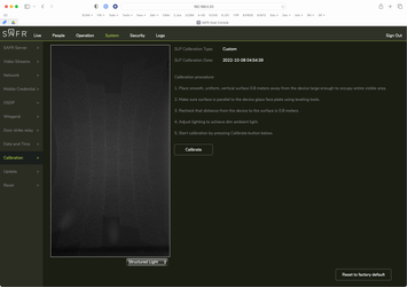
3.3 Calibration procedure
- Place smooth, uniform, vertical surface 0.8 meters away from the device large enough to occupy entire visible area.
- Make sure surface is parallel to the device glass face plate using leveling tools.
- Recheck that distance from the device to the surface is 0.8 meters.
- Adjust lighting to achieve dim ambient light.
- Start calibration by pressing Calibrate button below.
![]() If calibration does not resolve the issue or worsens it, you have the option to reset to factory default calibration on the calibration page.
If calibration does not resolve the issue or worsens it, you have the option to reset to factory default calibration on the calibration page.