First evaluate what is preventing access granted action. Open SAFR SCAN Web Console Live view and run following tests:
- Is face being detected or does it take a long time to detect face (i.e. does it begin to put a box around the face)
- If not, then set Scene Exposure Region as described below.
- Is face matched and is this occurring within desired time)
- If not, face image may be old or not representative of current face. Try adding additional face as described in Adding Alternate Faces for Improved Face Matching
- Is face matched but not verified as live in timely manor (i.e. no green heart icon or orange heart icon appears in event window / no access granted)
- If you see orange heart or no heart icon, then check calibration as per Checking Calibration and adjust as needed as per Calibrating Structured Light Sensor.
SAFR SCAN Camera Settings
Below are the settings that control how SAFR SCAN compensates for strong lighting conditions. These are referenced below. 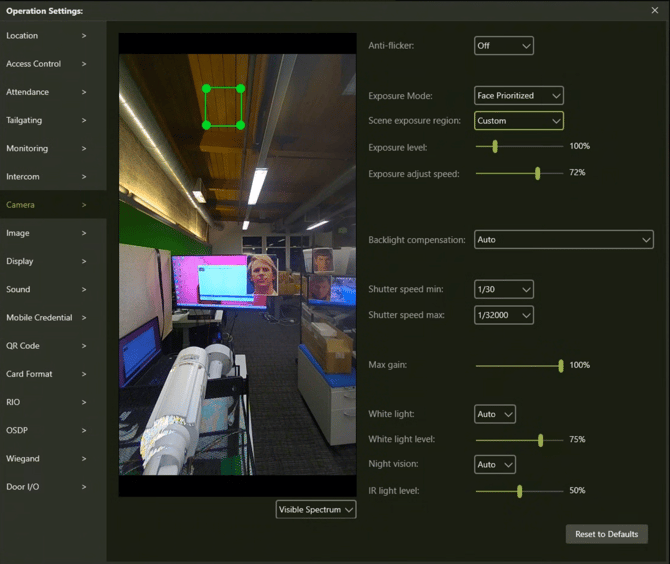 See SAFR SCAN Administrator Guide at http://docs.real.com guidance for more information on these settings.
Scene exposure region controls the exposure when no faces are in view. Setting this is necessary when the lighting conditions cause over or under exposure preventing SAFR SCAN from finding a face when it enters the view.
Set this to a region in the view that has similar light conditions as a face. Typically a surface facing the reader that is darker and does not experience direct sun. Avoid regions that will have direct sunlight, especially when reflective such as concrete or floors.
To determine if scene exposure is set well, monitor the Live playback with no faces in view and have someone enters the view. If a bounding box quickly appears around their face, then this setting is ok.
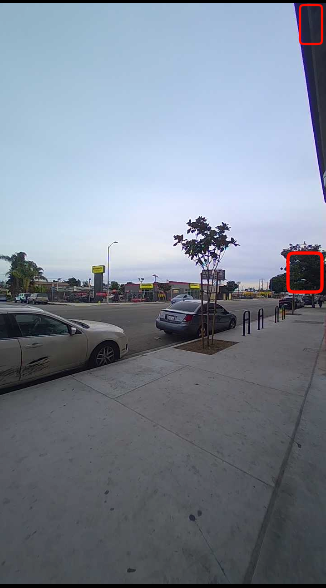
Here are examples when and where to set scene exposure region:
Foliage is often a good choice, even if sun falls on it, it often does not have the
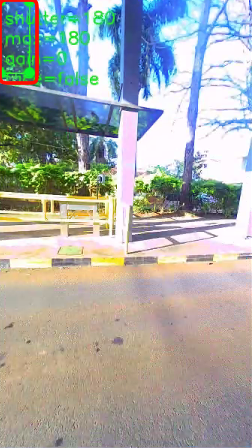
Underside of overhangs is also a good choice as shown below (or the foliage option also shown):
Adjust Backlight compensation until you find performance is best. Start at Auto and move up to Slight backlight and further until a setting works well. Each option include the suggested conditions under which it works best.
Even when not set to Auto, SCAN will still perform well when the strong backlight is gone (i.e. evening) because it only invokes the behavior when a strong backlight condition exists.
Shutter speed max
In backlight conditions where there is a consistent light source on the face (e.g. lobby reader with indoor light from inside and strong sun on background), you can force the max shutter speed to 1/20 or 1/60 suitable for the indoor light source. By doing this, you are instructing SAFR SCAN not to try to adjust exposure for the strong background light - SAFR SCAN will maintain exposure suitable for the face which is lit by the fixed indoor lighting.
Exposure adjust speed
In some conditions where lighting to the face changes rapidly as a person approaches the reader (e.g. Ceiling spotlight lighting ), it may be necessary to increase the exposure adjust speed higher to quickly adjust to the varying lighting. Change this gradually, testing between changes.
Exposure level
If the lighting overall is dark, use the exposure level setting to brighten the face. This setting should be last to be adjusted, first attempting to compensate via other means above.
Direct sun on face or behind face
The most challenging conditions are direct sun on the face (especially when on only one side) or sun pointing into the lens directly behind the face. In these conditions, the following may help.
1. Go to Advanced Feed Settings for the reader via the "..." menu
2. Click Add and add the following property with the value of 0.3 (default is 0.5).
detector.rgb-liveness-threshold set to 0.3Troubleshooting LIghting
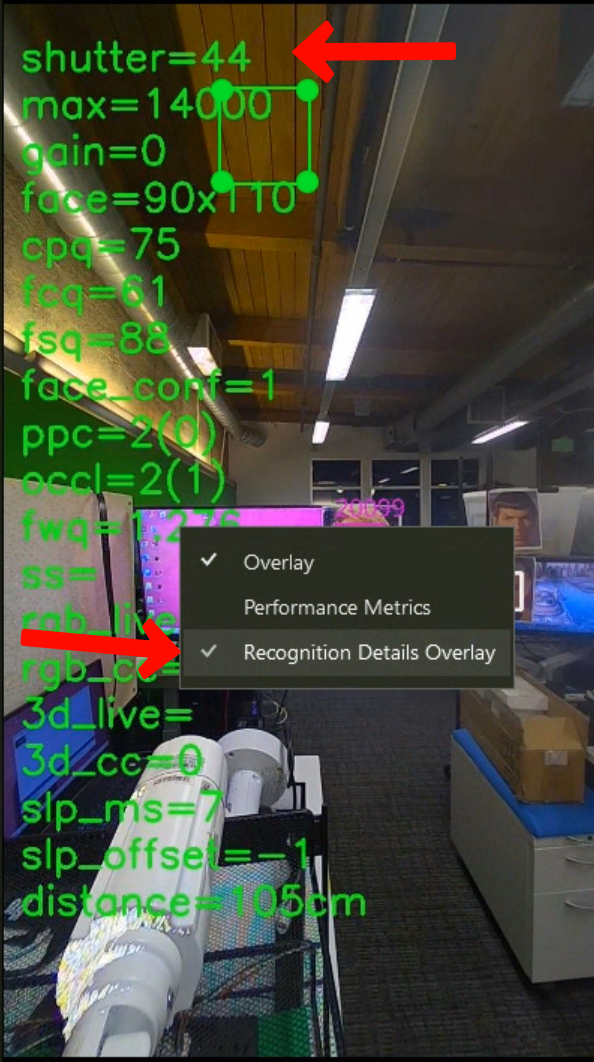
A helpful tool in troubleshooting lighting conditions is the Recognition Details Overlay as shown below. Enable this by clicking in the video region and checking the menu option. The "shutter" value at the top indicates the current shutter speed. You can determine the optimal value by having someone stand in front of the reader and once the reader has adjusted to optimal face lighting, read the value of shutter.